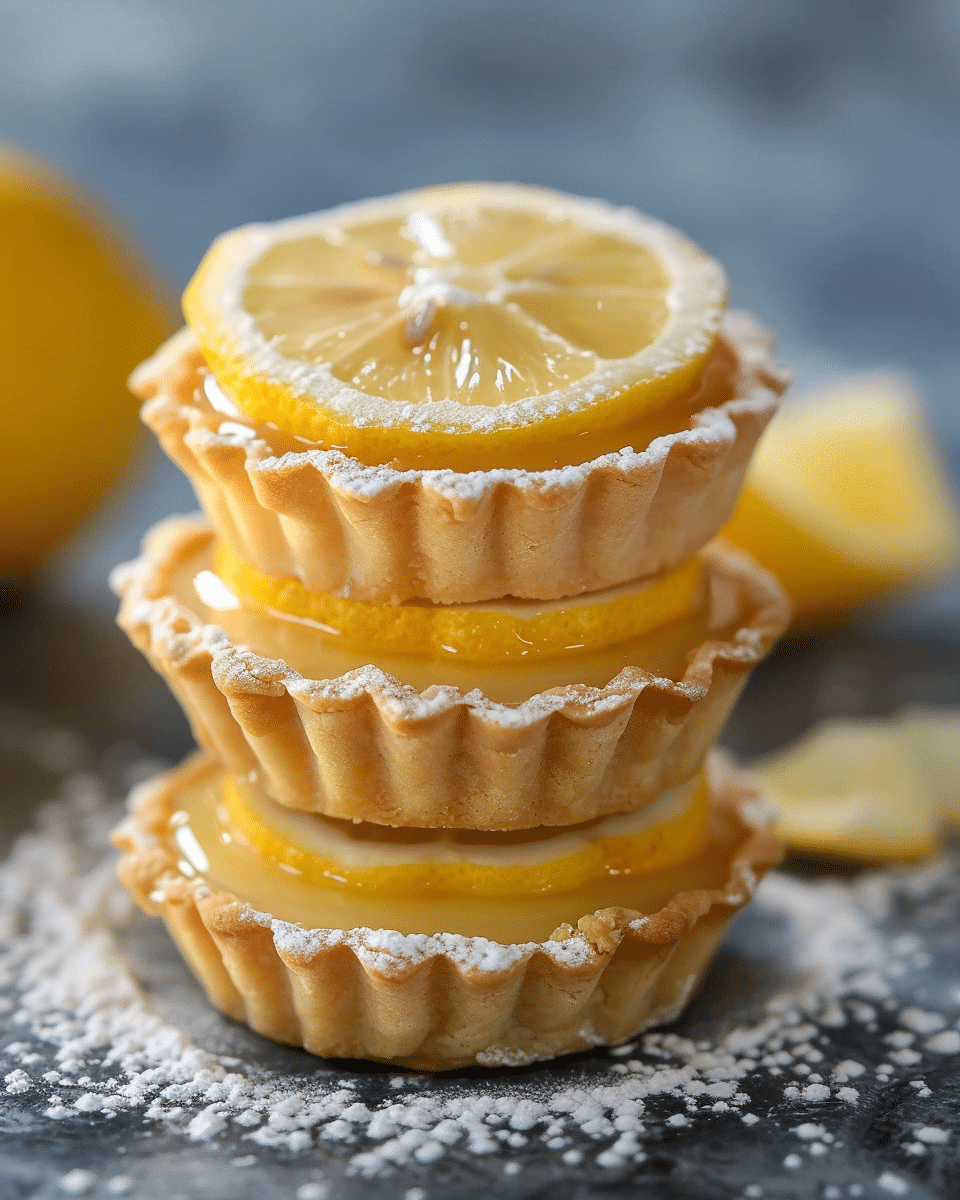
I love this recipe because it combines bold lemon flavor with a creamy, velvety texture in a completely plant-based dessert. The crust is tender and slightly buttery, while the filling is rich, tangy, and perfectly set. I also enjoy how decorative and pretty they look with the cream piping, making them feel bakery-worthy while still being homemade.
Ingredients
(Here’s a tip: Check out the full list of ingredients and measurements in the recipe card below.)
For the crust
250 g plain flour (or gluten-free alternative)
Zest of 1 medium lemon
50 g caster sugar
200 g dairy-free block butter, softened
For the lemon filling
160 g lemon juice
250 g coconut milk (cream only)
250 g caster sugar
6 tablespoons cornflour (cornstarch)
Pinch of turmeric or yellow food coloring
For the decoration
220 ml dairy-free whipping cream
Directions
Crust
I start by preheating the oven to 180°C (fan) and lightly greasing mini tartlet tins.
I mix flour, lemon zest, and sugar in a bowl until combined.
I add softened dairy-free butter and rub it into the dry ingredients until a crumbly dough forms.
I press the dough evenly into the tart tins, making sure the base and sides are well covered.
I prick the bases with a fork and bake for about 20 minutes until lightly golden.
I remove the tart shells from the oven and set them aside.
Lemon filling
I use only the thick coconut cream from the can and combine it with lemon juice, sugar, cornflour, and turmeric in a saucepan.
I heat the mixture over medium heat, stirring constantly until it thickens into a glossy curd.
I set aside a small portion of the filling for decoration later.
I immediately pour the warm lemon filling into the baked tart shells.
I bake them again for about 10 minutes to help set the filling.
I let them cool completely, then refrigerate for about 6 hours until fully set.
Decoration
I whisk the reserved lemon filling to smooth it out and transfer it into a piping bag.
I whip the dairy-free cream until soft peaks form and place it into another piping bag.
I pipe cream on top of each tart in a flower pattern.
I add a small dollop of lemon filling in the center of each decoration.
I finish with a light dusting of icing sugar before serving.
Servings and timing
Servings: 8–10 mini tarts
Prep Time: 40 minutes
Cook Time: 30 minutes
Chill Time: 6 hours
Total Time: 7 hours 10 minutes
Variations
I sometimes add lime or orange juice alongside the lemon for a citrus blend. When I want a richer filling, I mix a little coconut cream into the whipped topping. I also enjoy adding a raspberry or blueberry on top for color and extra fruit flavor. For a crunchier texture, I occasionally sprinkle crushed biscuits over the cream.
storage/reheating
I store these mini tarts in the refrigerator for up to 3 days in an airtight container. I prefer serving them chilled so the filling stays firm and refreshing. I do not reheat them because they are meant to be enjoyed cold.
FAQs
Can I make these tarts ahead of time?
Yes, I often prepare them the day before so they have enough time to fully set in the fridge.
Can I use store-bought tart shells?
Yes, I can use pre-made tart shells to save time, but homemade crust gives better flavor.
Why do I need to chill the filling?
I chill the filling so it fully sets and holds its shape when sliced or bitten into.
Can I use regular milk instead of coconut milk?
I prefer coconut cream for richness, but plant-based cream alternatives also work well.
Can I freeze these mini tarts?
Yes, I can freeze them without the cream topping, then add decoration after thawing.
Conclusion
These Vegan Mini Lemon Tarts are one of my favorite citrus desserts because they are bright, creamy, and beautifully balanced. I love how the crisp crust and silky lemon filling create a refreshing contrast, while the whipped topping adds elegance. They are simple enough for home baking yet impressive enough to serve at special occasions.
Buttery vegan mini lemon tarts filled with tangy lemon curd and topped with dairy-free cream. A bright and elegant plant-based dessert.
Author:Sarah
Prep Time:10 minutes
Cook Time:30 minutes
Total Time:~6 hours 40 minutes
Yield:8–10 mini tarts
Category:Dessert, Tart, Mini Desserts
Method:Baking, Chilling
Cuisine:Vegan, European-Inspired
Diet:Vegan
Ingredients
Crust
250g plain flour (or gluten-free flour)
Zest of 1 medium lemon
50g caster sugar
200g dairy-free block butter (softened)
Lemon Filling
160g lemon juice
250g coconut milk (thick cream only)
250g caster sugar
6 tbsp cornflour / cornstarch
Pinch of turmeric (or yellow food coloring)
Decoration
220ml dairy-free whipping cream
Instructions
Crust
Preheat oven to 180°C (fan). Lightly grease mini tart tins.
Mix flour, lemon zest, and sugar in a bowl.
Rub in dairy-free butter until a crumbly dough forms.
Press dough into tart tins evenly. Prick bases with a fork.
Bake for 20 minutes until lightly golden.
Remove and let cool slightly.
Lemon Filling
In a saucepan, combine lemon juice, coconut cream, sugar, cornflour, and turmeric.
Cook over medium heat, stirring constantly until thick and glossy (about 5 minutes).
Reserve 2 tbsp filling for decoration and chill it.
Pour remaining filling into tart shells while warm.
Bake again for 10 minutes to set.
Cool completely, then refrigerate for at least 6 hours.
Decoration
Whip dairy-free cream until soft peaks form.
Pipe whipped cream onto chilled tarts.
Add reserved lemon curd in the center as decoration.
Dust with icing sugar if desired and serve.
Notes
Coconut milk cream gives the filling its rich texture.
Chilling time is essential for proper setting.
Tart shells must be fully cooled before filling.
Store in the fridge for best freshness.
Best served cold for a firm, creamy texture.


