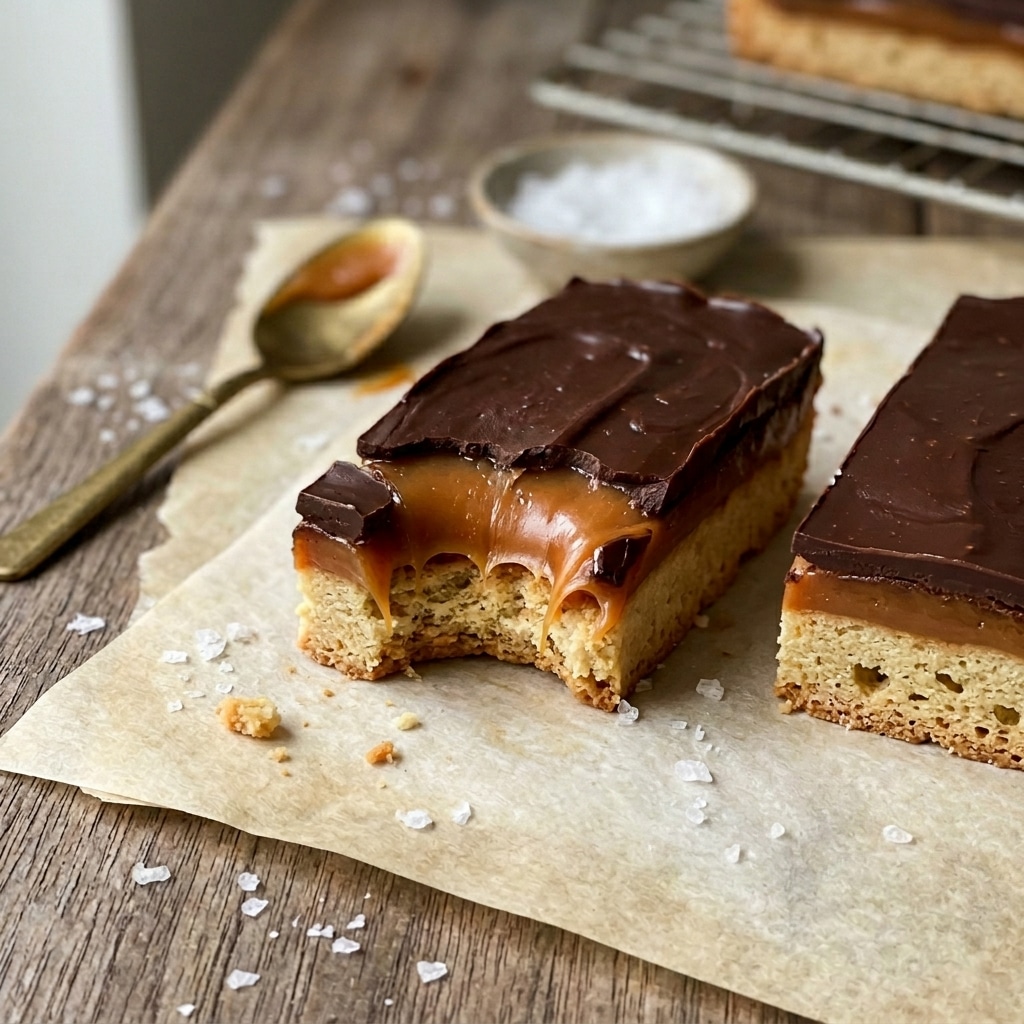
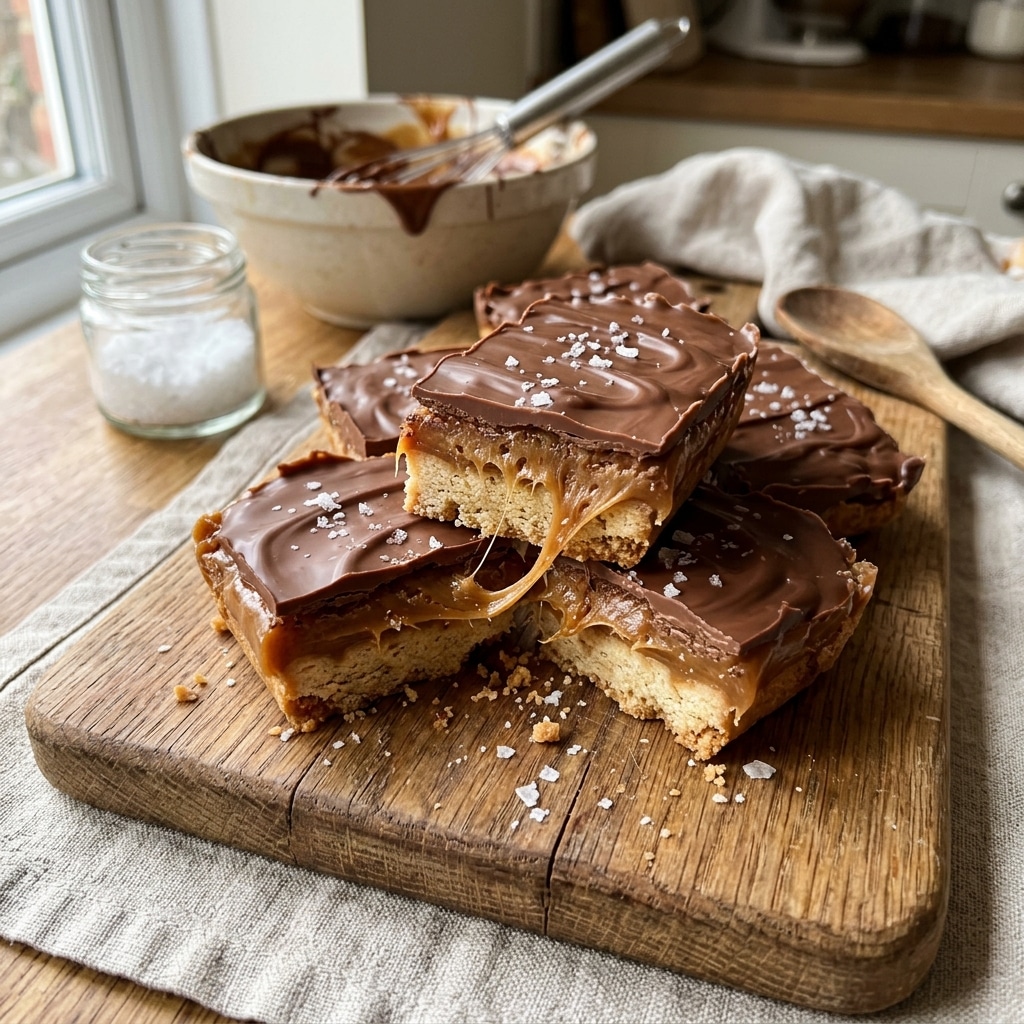
I enjoy this recipe because each layer brings something special. The shortbread cookie stays buttery and crisp, the caramel is rich and chewy, and the chocolate coating ties everything together perfectly.
Another reason I love making these bars is that they feel impressive while still being simple to prepare step by step. Even though the recipe takes some chilling time, most of the process is easy and relaxing.
I also appreciate how customizable these bars are. I can use dark chocolate, add flaky sea salt, or make thicker caramel layers depending on what I’m craving.
Ingredients
(Here’s a tip: Check out the full list of ingredients and measurements in the recipe card below.)
Shortbread Cookie Layer
1/2 cup unsalted butter, room temperature
1/2 cup granulated sugar
1 large egg yolk
1 1/4 cups all-purpose flour
1/4 teaspoon salt
Chocolate Coating
6 ounces semi-sweet chocolate, finely chopped
1 tablespoon coconut oil
Homemade Caramel
1 cup granulated sugar
6 tablespoons unsalted butter
6 tablespoons heavy cream
1/2 teaspoon salt
1 teaspoon vanilla extract
Directions
I preheat the oven to 350°F and line an 8 x 8-inch pan with parchment paper, making sure all sides have enough overhang for easy removal later.
In a food processor, I combine the cookie ingredients and pulse until the mixture forms a dough.
I press the dough evenly into the prepared pan and poke the surface all over with a fork.
I bake the shortbread for about 20 minutes until lightly golden brown, then let it cool completely.
While the cookie layer cools, I prepare the caramel by heating the sugar in a heavy-bottomed saucepan over medium-low heat until fully melted. I gently swirl the pan occasionally to help the sugar melt evenly.
Once melted, I remove the pan from the heat and carefully stir in the butter. The mixture bubbles vigorously, which is completely normal.
I slowly pour in the heavy cream and add the salt, stirring until smooth and fully combined. Then I mix in the vanilla extract.
I let the caramel cool for about 5 minutes before pouring it evenly over the cooled cookie layer.
I cover the pan and refrigerate it for at least 2 hours or overnight until fully set.
Once chilled, I lift the bars from the pan using the parchment paper and cut them into 16 bars.
I place the bars in the freezer while preparing the chocolate coating.
I combine the chopped chocolate and coconut oil in a microwave-safe bowl and melt them in 20-second intervals, stirring between each until smooth.
I dip each chilled bar into the melted chocolate, using a fork to coat all sides evenly.
I place the coated bars onto wax paper and repeat with the remaining bars.
I refrigerate the bars for about 15 minutes until the chocolate hardens before serving.
Servings and timing
Servings: 16 bars
Prep Time: 30 minutes
Chill Time: 2 hours
Cook Time: 20 minutes
Total Time: Approximately 3 hours
I find the chilling time completely worth it because it helps the caramel and chocolate set perfectly for clean slices and the best texture.
Variations
I sometimes use dark chocolate instead of semi-sweet chocolate for a richer flavor. Milk chocolate also works beautifully if I want a sweeter version closer to classic candy bars.
For extra texture, I occasionally sprinkle flaky sea salt on top of the chocolate before it sets. I also enjoy adding chopped toasted nuts or a drizzle of white chocolate for a decorative finish.
If I want a thicker caramel layer, I simply increase the caramel ingredients slightly while keeping the same method.
storage/reheating
I store the bars in an airtight container in the refrigerator for up to 1 week. Keeping them chilled helps maintain the perfect caramel texture.
For longer storage, I freeze the bars for up to 2 months. I separate layers with parchment paper to prevent sticking.
Before serving from the refrigerator, I sometimes let the bars sit at room temperature for a few minutes so the caramel softens slightly.
FAQs
Why did my caramel turn grainy?
This usually happens if the sugar crystals are not fully melted. I make sure to melt the sugar slowly and avoid stirring too aggressively during the melting stage.
Can I use store-bought caramel instead?
I can, but homemade caramel gives the bars a fresher and richer flavor that makes a big difference.
How do I cut the bars cleanly?
I use a sharp knife and wipe it clean between cuts for neat edges.
Can I make these bars ahead of time?
I often make them a day in advance because they store very well and taste even better once fully chilled.
Why do I freeze the bars before dipping them in chocolate?
Freezing helps the caramel stay firm and makes the chocolate coating process much easier and cleaner.
Conclusion
I love how these homemade Twix bars combine buttery shortbread, chewy caramel, and rich chocolate into one irresistible dessert. The layers create the perfect balance of texture and flavor, making every bite feel indulgent and satisfying. Whether I make them for parties, holidays, or simply to satisfy a sweet craving, these bars always disappear quickly and taste far better than store-bought candy bars.
Make irresistible homemade Twix bars with layers of buttery cookie, creamy caramel, and smooth chocolate just like the classic candy bar.
Author:Sarah
Prep Time:30 minutes
Cook Time:32 minutes
Total Time:3 hours 2 minutes
Yield:16 servings
Category:Dessert / Candy
Method:Baking / Chilling
Cuisine:American
Diet:Vegetarian
Ingredients
Shortbread Cookie Layer
1/2 cup unsalted butter, softened
1/2 cup granulated sugar
1 large egg yolk
1 1/4 cups all-purpose flour
1/4 teaspoon salt
Homemade Caramel
1 cup granulated sugar
6 tablespoons unsalted butter
6 tablespoons heavy cream
1/2 teaspoon salt
1 teaspoon vanilla extract
Chocolate Coating
6 ounces semi-sweet chocolate, finely chopped
1 tablespoon coconut oil
Instructions
Step 1: Prepare the Pan
Preheat the oven to 350°F (175°C). Line an 8×8-inch baking pan with parchment paper on all sides, leaving a 2-inch overhang for easy removal.
Step 2: Make the Shortbread Base
In a food processor, combine butter, sugar, egg yolk, flour, and salt. Pulse until the dough comes together.
Press the dough evenly into the prepared pan and prick the surface with a fork.
Step 3: Bake
Bake for 20 minutes or until lightly golden brown. Remove from the oven and allow the shortbread to cool completely.
Step 4: Make the Caramel
In a heavy-bottomed saucepan over medium-low heat, melt the sugar slowly, swirling the pan occasionally until completely melted and amber-colored.
Remove from heat and carefully stir in the butter. The mixture will bubble vigorously.
Add the heavy cream, salt, and vanilla extract, stirring until smooth and fully combined.
Allow the caramel to cool for about 5 minutes.
Step 5: Add the Caramel Layer
Pour the caramel over the cooled shortbread and spread evenly.
Cover the pan with foil or plastic wrap and refrigerate for at least 2 hours or overnight until firm.
Step 6: Slice the Bars
Lift the bars from the pan using the parchment overhang. Transfer to a cutting board and cut into 16 bars.
Place the bars into the freezer while preparing the chocolate coating.
Step 7: Melt the Chocolate
Combine chopped chocolate and coconut oil in a microwave-safe bowl.
Microwave in 20-second intervals, stirring between each interval until smooth and melted. Alternatively, use a double boiler.
Step 8: Coat the Bars
Dip each caramel bar into the melted chocolate, using a fork to coat evenly on all sides.
Place coated bars onto wax paper or parchment paper.
Step 9: Chill and Serve
Refrigerate the bars for about 15 minutes or until the chocolate is fully set.
Serve chilled or at room temperature.
Notes
Line the pan fully with parchment paper for easy lifting and slicing.
Freeze the bars briefly before dipping to help maintain clean layers.
Use high-quality chocolate for the best flavor and texture.
Sprinkle flaky sea salt on top for a salted caramel variation.
Store in an airtight container in the refrigerator for up to 1 week.


