
Why You’ll Love This Recipe
I adore this recipe because it’s simple, elegant, and bursting with flavor. The combination of tangy cream cheese, sweet banana pudding, and airy whipped topping creates the perfect texture balance. I also love that it’s no-bake, so I can make it ahead of time and let it chill while I focus on other parts of a meal or event. It’s light yet rich, and it never fails to impress guests with its creamy layers and classic banana pudding charm.

Ingredients
(Here’s a tip: Check out the full list of ingredients and measurements in the recipe card below.)
2 ¼ cups vanilla wafer crumbs
¼ cup packed light brown sugar
⅓ cup butter, melted
8 ounces cream cheese, softened
3.4-ounce box instant banana pudding mix
¾ cup milk (1%)
1 ripe banana, mashed
8 ounces whipped topping
10–12 mini vanilla wafers (for topping)
1 banana, sliced (for topping)
1 cup whipped topping (for topping)
Directions
-
Prepare the crust: I pulse vanilla wafers in a food processor until fine crumbs form, then mix them with brown sugar and melted butter. I press the mixture firmly into the bottom and slightly up the sides of a greased 9-inch springform pan, then refrigerate it while I prepare the filling.
-
Make the cheesecake filling: In one bowl, I beat softened cream cheese until smooth. In another bowl, I whisk the pudding mix and milk until thickened. I add the pudding mixture and mashed banana to the cream cheese and beat again until creamy. Then, I gently fold in the whipped topping until everything is well combined.
-
Assemble the cheesecake: I spread half of the cheesecake mixture over the crust, layer banana slices on top, then spread the rest of the mixture evenly. I cover it with plastic wrap and refrigerate for at least 2–4 hours so the filling sets nicely.
-
Add toppings and serve: Before serving, I pipe whipped topping over the cheesecake, then garnish with mini vanilla wafers and fresh banana slices. For a final touch, I sprinkle leftover wafer crumbs on top.
Servings and timing
This recipe makes about 10 slices and takes roughly 2 hours and 20 minutes in total (20 minutes of prep and 2 hours of chilling). It’s perfect for making ahead before a dinner party or holiday meal.
Variations
-
I sometimes use chocolate or coconut pudding mix for a different twist on the classic flavor.
-
For a lighter version, I use reduced-fat cream cheese and light whipped topping.
-
When I want extra texture, I layer crushed vanilla wafers between the cheesecake filling.
-
I’ve even made mini versions in individual cups for parties—adorable and easy to serve.
-
For a bit of spice, I like to add a pinch of cinnamon or nutmeg to the crust mixture.
Storage/Reheating
I store leftovers covered in the refrigerator for up to 3 days. Since this is a no-bake cheesecake, I never freeze it—the texture changes too much once thawed. I slice bananas fresh for topping each time I serve to keep them from browning.
FAQs
Can I use a different type of crust?
Yes, I sometimes use a graham cracker crust instead of vanilla wafers. It gives a slightly nuttier flavor that pairs beautifully with the banana filling.
What can I do if I don’t have instant banana pudding mix?
I use vanilla pudding mix instead and add a little extra mashed banana or banana extract for that signature flavor.
How do I keep the bananas from turning brown?
I slice them just before serving and lightly brush them with lemon juice to slow browning without changing the flavor too much.
Can I make this ahead of time?
Absolutely. I love making it the night before—it gives the cheesecake time to firm up and the flavors to meld together beautifully.
Why is my filling too soft?
It’s usually because the pudding mixture wasn’t thick enough before mixing or the cheesecake didn’t chill long enough. I always let it refrigerate at least 2 hours before slicing.

Conclusion
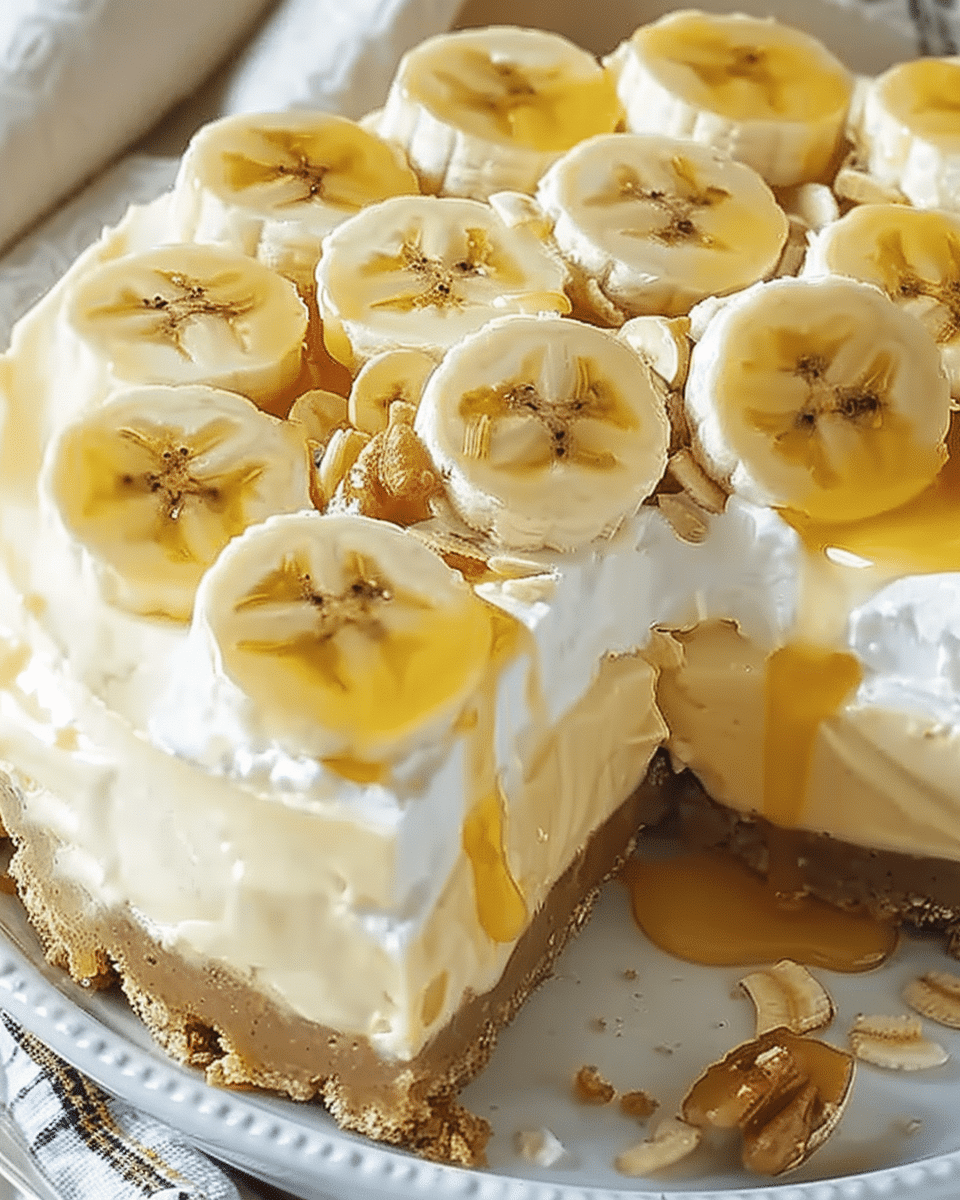
I love how this Ultimate Banana Pudding Cheesecake Delight combines two favorite desserts into one creamy, dreamy masterpiece. With its smooth filling, buttery crust, and fluffy whipped topping, it’s the perfect dessert for any gathering—or just when I want to treat myself to something special. Every bite is pure banana bliss.
PrintUltimate Banana Pudding Cheesecake Delight

This no-bake banana pudding cheesecake is the ultimate creamy dessert with a vanilla wafer crust, whipped topping, and fresh banana slices. It’s nostalgic, easy, and irresistibly delicious!
- Prep Time: 20 minutes
- Total Time: 2 hours 20 minutes
- Yield: 10 slices
- Category: Dessert
- Method: No-Bake
- Cuisine: American
- Diet: Vegetarian
Ingredients
Crust:
2 ¼ cups vanilla wafer crumbs
¼ cup packed light brown sugar
⅓ cup butter, melted
Filling:
8 oz cream cheese, softened
1 (3.4 oz) box instant banana pudding mix
¾ cup milk (1%)
1 ripe banana, mashed
8 oz whipped topping (e.g., Cool Whip)
Topping:
10–12 mini vanilla wafers
1 banana, sliced
1 cup whipped topping
Extra vanilla wafer crumbs (optional)
Instructions
Prepare the Crust: Pulse vanilla wafers into fine crumbs. Mix with brown sugar and melted butter. Press mixture into the bottom and sides of a greased 9-inch springform pan. Chill in the fridge while preparing the filling.
Make the Filling: Beat softened cream cheese until smooth. In a separate bowl, whisk pudding mix with milk until thickened. Add mashed banana. Combine with cream cheese, then fold in whipped topping until smooth.
Assemble: Spread half of the filling over the crust. Arrange banana slices over the top, then add the remaining filling. Smooth the surface. Cover and refrigerate for 2–4 hours.
Top and Serve: Before serving, top with piped whipped topping, mini vanilla wafers, sliced bananas, and extra wafer crumbs if desired. Slice and enjoy!
Notes
Soften cream cheese fully to avoid lumps.
Use ripe bananas for sweetness and creamy texture.
Chill for at least 2 hours to allow the cheesecake to firm up.
To prevent bananas from browning, slice just before serving and brush with lemon juice if desired.
Store leftovers covered in the fridge for up to 3 days.


