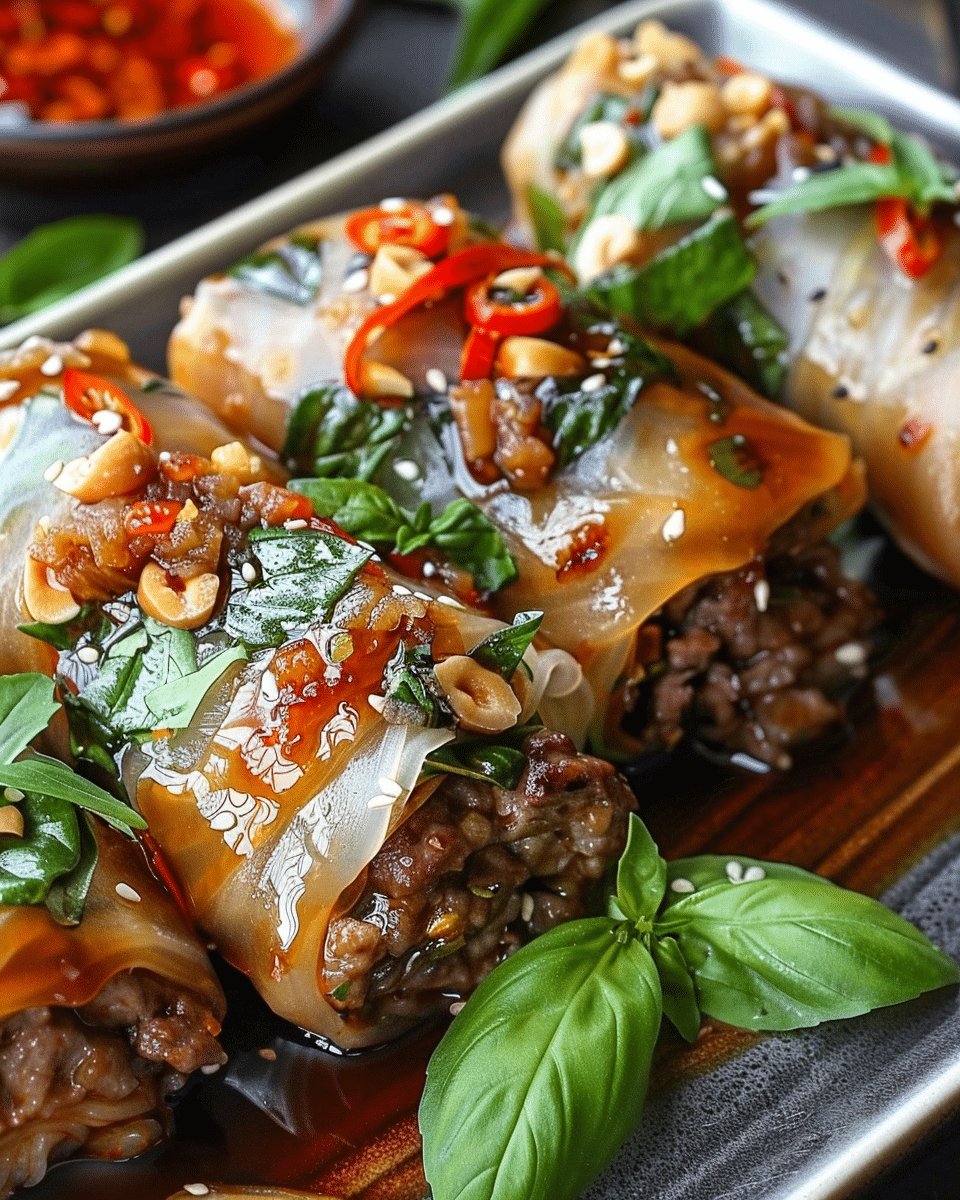
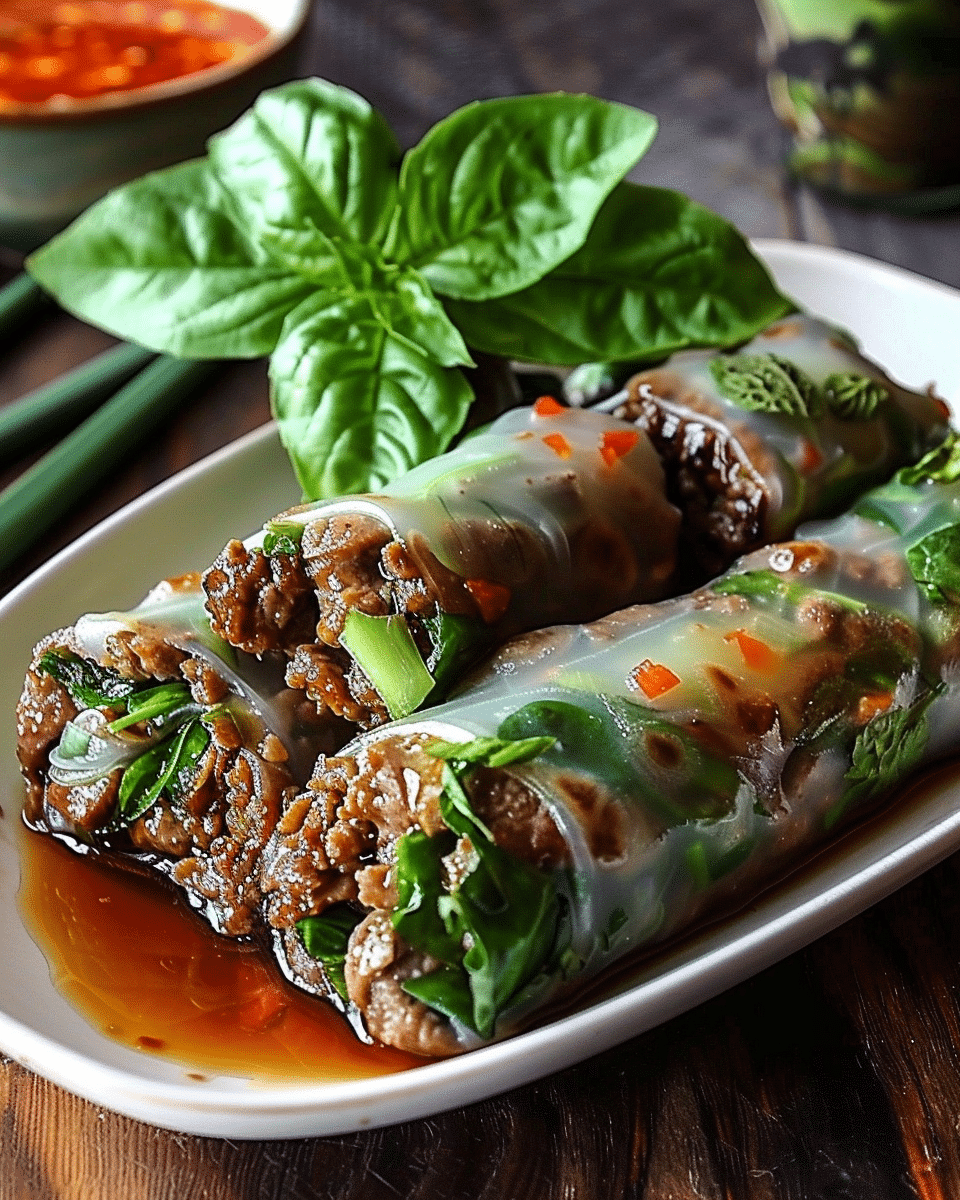
I love these Thai Basil Beef Rolls because they’re the perfect balance of satisfying and refreshing. The beef is rich and savory thanks to the soy and hoisin sauces, while the raw veggies and basil add crunch and brightness.
Quick and easy – Ready in under 30 minutes from start to finish
Fresh and flavorful – Basil, carrots, and bell peppers bring vibrant taste and color
Customizable – Easy to adjust based on what I have in the fridge
Great for entertaining – Fun to serve and eat with dipping sauces
Light yet filling – A perfect warm-weather or post-workout meal
Ingredients
(Here’s a tip: Check out the full list of ingredients and measurements in the recipe card below.)
lean ground beef
soy sauce
hoisin sauce
shredded carrots
chopped bell peppers
fresh basil leaves
rice paper wrappers
Directions
Step 1: Cook the Beef
In a skillet over medium heat, I brown the ground beef until no longer pink. I stir in the soy sauce and hoisin sauce, then let it simmer for 2–3 minutes to soak up the flavor.
Step 2: Add the Vegetables
Once the beef is cooked, I mix in the shredded carrots and chopped bell peppers. I cook everything together for another 2–3 minutes until the veggies start to soften but still keep their crunch.
Step 3: Soften the Rice Paper
I fill a shallow dish with warm water and dip each rice paper wrapper in for about 10–15 seconds until it becomes soft and pliable. I place the softened wrapper on a damp surface (a clean cutting board works great).
Step 4: Assemble the Rolls
In the center of each wrapper, I place a spoonful of the beef mixture and a few fresh basil leaves. I fold the bottom edge up over the filling, tuck in the sides, and roll it tightly like a burrito.
Step 5: Serve
These rolls are best served fresh. I like to pair them with a side of sweet chili sauce, peanut sauce, or soy dipping sauce for extra flavor.
Servings and Timing
Servings: Makes about 6–8 rolls
Prep time: 15 minutes
Cook time: 10 minutes
Total time: 25 minutes
Variations
Use different protein: Ground chicken, turkey, or pork work just as well as beef.
Make it vegetarian: Swap the meat for crumbled tofu or sautéed mushrooms.
Add rice noodles: A small bundle of soaked rice vermicelli adds extra texture and makes the rolls more filling.
Spice it up: Add a few slices of jalapeño or a drizzle of sriracha inside each roll.
More herbs: I sometimes toss in mint or cilantro with the basil for a burst of freshness.
Storage/Reheating
Store: I keep leftover rolls in an airtight container with damp paper towels between layers to prevent sticking. They last in the fridge for up to 2 days.
Reheat: I usually don’t reheat them since they’re meant to be eaten fresh and cool, but I sometimes warm the filling separately if making ahead.
FAQs
Can I make these Thai Basil Beef Rolls ahead of time?
Yes, but I recommend assembling them just before serving to keep the rice paper soft and pliable. I sometimes prep the filling in advance and store it in the fridge.
What kind of basil should I use?
I use Thai basil for an authentic flavor, but if I can’t find it, sweet basil works just fine. Thai basil has a slight licorice note that makes the rolls pop.
Are rice paper wrappers gluten-free?
Most rice paper wrappers are naturally gluten-free, but I always double-check the label to be sure. Same goes for the sauces.
What dipping sauce goes best with these?
Sweet chili sauce is my favorite, but peanut sauce, soy sauce with lime, or even a garlic-lime vinaigrette all work beautifully.
Can I bake or fry these?
These are meant to be eaten fresh and soft like summer rolls, but if I’m craving a crunch, I sometimes pan-fry them lightly until golden for a crispy version.
Conclusion
Thai Basil Beef Rolls are the kind of recipe I return to again and again. They’re fresh, flavorful, and easy to adapt based on what I’ve got on hand. Whether I’m serving them as a light dinner or a fun party appetizer, they always impress without requiring a ton of work. Give them a try—I think you’ll love how fast and flavorful they are!
These Thai basil beef rolls are bursting with fresh flavor! Tender ground beef, crisp veggies, and fragrant basil wrapped in soft rice paper—an easy, healthy appetizer or light meal.
Author:Sarah
Prep Time:15 minutes
Cook Time:10 minutes
Total Time:25 minutes
Yield:8–10 rolls
Category:Appetizer, Light Dinner, Lunch
Method:Sautéing, Rolling
Cuisine:Thai-Inspired, Asian Fusion
Ingredients
1 lb lean ground beef
1 tbsp soy sauce
1 tbsp hoisin sauce
1 cup shredded carrots
1/2 cup chopped bell peppers (any color)
Fresh Thai basil leaves (or regular basil)
Rice paper wrappers
Optional: Sweet chili sauce or peanut sauce for dipping
Instructions
Cook the beef:
In a skillet over medium heat, cook the ground beef with soy sauce and hoisin sauce until browned and fully cooked, about 6–8 minutes.
Add vegetables:
Stir in shredded carrots and chopped bell peppers. Cook for an additional 2–3 minutes until just tender. Remove from heat.
Prepare rice paper:
Fill a shallow dish with warm water. Dip one rice paper wrapper into the water for about 10–15 seconds until softened. Lay it flat on a clean surface.
Assemble rolls:
Place a few fresh basil leaves, a spoonful of the beef mixture, and extra veggies (if desired) in the center of the wrapper. Fold the sides over the filling, then roll tightly from the bottom.
Repeat and serve:
Continue with remaining wrappers and filling. Serve with your favorite dipping sauce.
Notes
Rice paper tip: Don’t oversoak the wrappers — they continue to soften as you work.
Make it spicy: Add a touch of Sriracha or chopped Thai chili to the beef mixture.
Vegetarian option: Swap ground beef for sautéed mushrooms or crumbled tofu.
Meal prep: Prepare filling in advance and roll fresh before serving for best texture.


