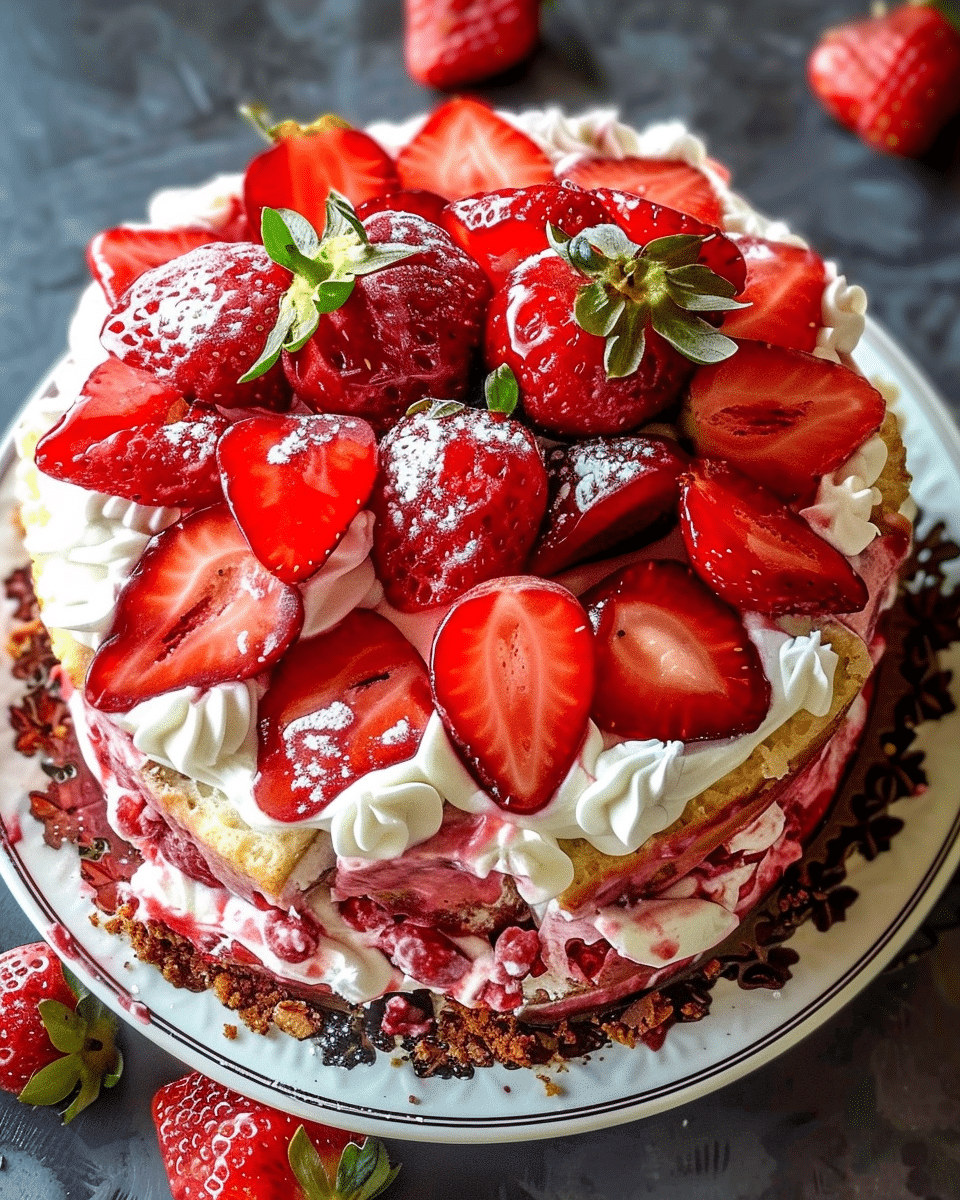
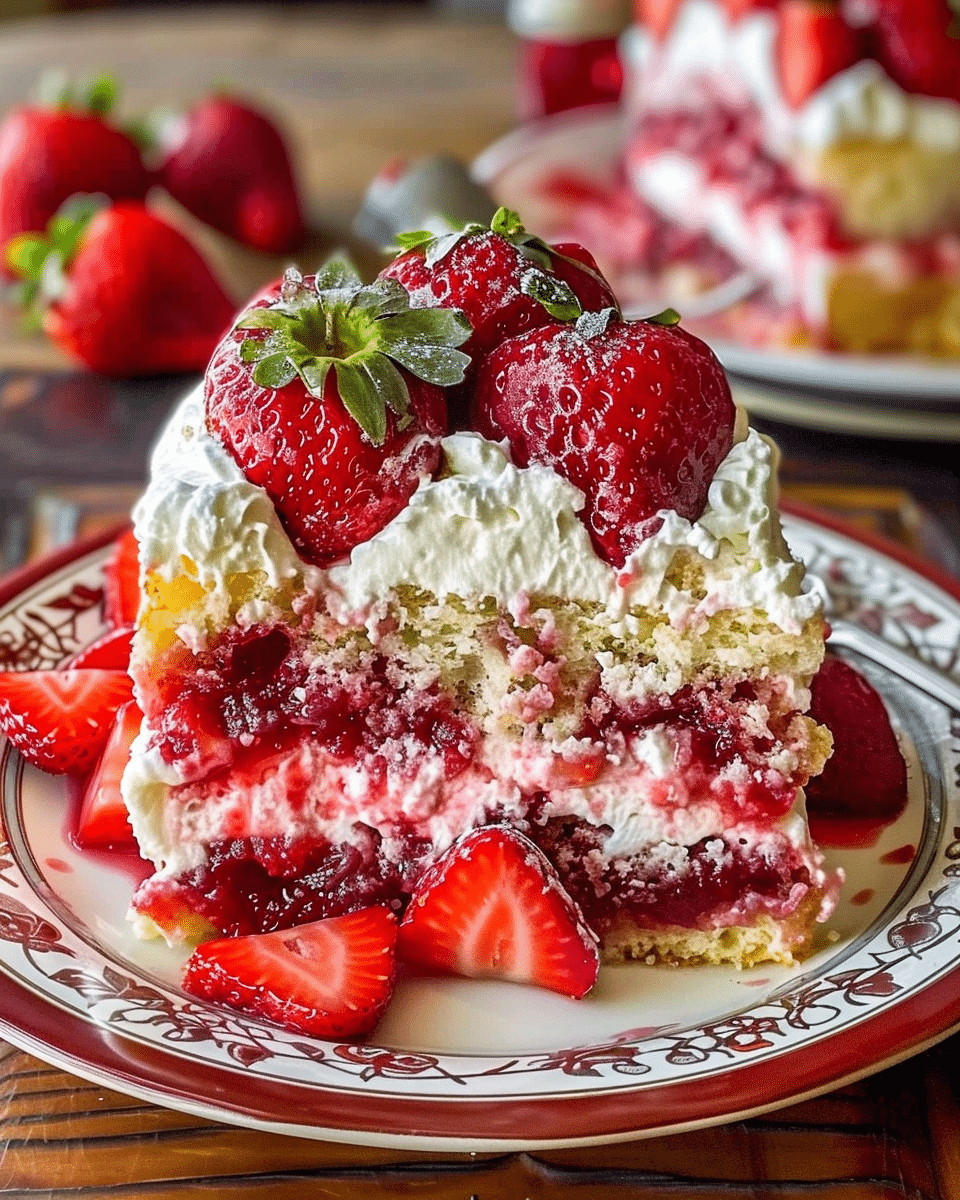
I love how this cake practically makes itself in the oven. I don’t need to worry about layering everything perfectly—the cream cheese mixture melts and swirls as it bakes, creating the signature “earthquake” look. The fresh strawberries add brightness, and the strawberry cake base brings a nostalgic, sweet flavor I can’t resist. Whether I serve it warm or chilled, it’s always a hit.
Ingredients
(Here’s a tip: Check out the full list of ingredients and measurements in the recipe card below.)
Cake Base:
1 box strawberry cake mix
3 eggs
½ cup (120 ml) vegetable oil
1 cup (240 ml) water
Add-ins:
1½ cups fresh or frozen strawberries, chopped
Cream Cheese Layer:
225 g cream cheese (room temperature)
½ cup (115 g) unsalted butter, melted
3 cups powdered sugar
1 teaspoon vanilla extract
Directions
1️⃣ Cake Base
I preheat the oven to 175°C (350°F).
I prepare the cake batter by mixing the boxed strawberry cake mix with eggs, oil, and water according to the package directions.
I pour half the batter into a greased 9×13 inch (23×33 cm) baking pan.
2️⃣ Add the Strawberries
I sprinkle half of the chopped strawberries evenly over the batter.
3️⃣ Cream Cheese Layer
In a separate bowl, I beat the cream cheese, melted butter, powdered sugar, and vanilla until smooth and fluffy.
I spoon the cream cheese mixture over the cake batter in random dollops—there’s no need to spread it evenly. This is what creates the “earthquake” effect as it bakes.
4️⃣ Assemble & Bake
I pour the remaining cake batter around and between the cream cheese dollops.
I sprinkle the rest of the strawberries on top.
I bake the cake for 35 to 45 minutes, or until the edges are set and the center is slightly gooey but not liquid. The top will look cracked and marbled—that’s exactly what I want.
5️⃣ Cool & Serve
I let the cake cool completely before slicing.
I like to top it with extra strawberries or a light dusting of powdered sugar before serving.
Servings and timing
This recipe makes about 12 generous servings. It takes 15 minutes to prep and 35 to 45 minutes to bake, for a total time of around 1 hour. It’s ideal for birthdays, brunches, or just when I want to treat myself to something playful and sweet.
Variations
Sometimes I add white chocolate chips or a handful of shredded coconut to the cream cheese layer for extra richness. If I want a tangier flavor, I use a lemon cake mix instead of strawberry. For a decorative finish, I drizzle a little white chocolate over the top once it cools.
Storage/Reheating
I store leftovers covered in the fridge for up to 4 days. This cake actually tastes even better the next day after the flavors have melded. If I want to serve it warm, I microwave individual slices for about 15 seconds to soften the cream cheese layer again.
FAQs
Can I use frozen strawberries?
Yes, I can! I just make sure to thaw and pat them dry with paper towels before using to avoid excess moisture in the cake.
Why is it called “earthquake” cake?
As the cream cheese layer bakes, it sinks and creates cracks and fissures in the top of the cake, giving it an “earthquake” look. It’s messy, but in the best way.
Can I use a different cake mix?
Absolutely. I’ve tried this with vanilla and lemon cake mixes for a different flavor twist, and it always turns out delicious.
How do I know when it’s done?
I look for set edges and a slightly soft center. A toothpick won’t come out completely clean because of the gooey filling, but the top should be golden and cracked.
Do I need to refrigerate it?
Yes, because of the cream cheese layer, I refrigerate any leftovers. It stays moist and flavorful for days.
Conclusion
This Strawberry Earthquake Cake is a playful, crowd-pleasing dessert that’s as easy to make as it is to enjoy. With its gooey cream cheese layer, juicy strawberries, and crackly top, every slice is a delicious surprise. Whether I’m baking it for a gathering or just for fun, it always brings smiles—and requests for seconds.
A rich, gooey dessert made with strawberry cake mix, cream cheese, and fresh berries. This strawberry earthquake cake is bursting with flavor and texture in every bite!
Author:Sarah
Prep Time:15 minutes
Cook Time:35–45 minutes
Total Time:50–60 minutes
Yield:12 servings
Category:Desserts & Sweets, Cakes
Method:Baking
Cuisine:American
Diet:Vegetarian
Ingredients
Cake Base:
1 box strawberry cake mix
Ingredients listed on the box (typically):
3 eggs
1/2 cup (120 ml) vegetable oil
1 cup (240 ml) water
Add-ins:
1½ cups fresh or frozen strawberries, chopped
Cream Cheese Layer:
225 g (8 oz) cream cheese, softened
1/2 cup (115 g) unsalted butter, melted
3 cups powdered sugar
1 tsp vanilla extract
Instructions
1. Prepare the Cake Base:
Preheat oven to 175°C (350°F).
Grease a 9×13-inch (23×33 cm) baking pan.
Prepare cake mix according to package instructions (mix with eggs, oil, and water).
Pour half of the batter into the prepared pan.
2. Add Strawberries:
Sprinkle half of the chopped strawberries evenly over the batter.
3. Make the Cream Cheese Layer:
In a bowl, beat cream cheese, melted butter, powdered sugar, and vanilla extract until smooth.
Spoon this mixture over the cake batter (do not spread fully—leave visible blobs).
4. Finish Assembling & Bake:
Pour the remaining cake batter between the cream cheese scoops.
Sprinkle remaining strawberries on top.
Bake for 35–45 minutes, until the edges are set and center is slightly moist.
5. Cool & Serve:
Let cake cool completely before slicing.
Optionally garnish with extra strawberries or a dusting of powdered sugar.
Notes
The “earthquake” effect is created by the weight of the cream cheese layer sinking into the cake.
Fresh strawberries yield a brighter flavor; frozen work well too, but thaw and drain first.
For extra indulgence, drizzle with white chocolate or serve with whipped cream.


