
Why You’ll Love This Recipe
I enjoy making homemade caramel apples because:
-
The scratch-made caramel has a rich, buttery flavor that’s better than store-bought.
-
It’s fun to customize with endless toppings—perfect for parties or family projects.
-
Chilled apples make the caramel set quickly for a neat finish.
-
The recipe makes a dozen apples, ideal for sharing.
-
They store well, so I can make them ahead for gatherings.

Ingredients
(Here’s a tip: Check out the full list of ingredients and measurements in the recipe card below.)
-
12 medium apples
-
¾ cup filtered water
-
2 cups granulated sugar (or light brown sugar)
-
1 teaspoon salt
-
1 ⅔ cups heavy cream, chilled
-
Popsicle sticks
-
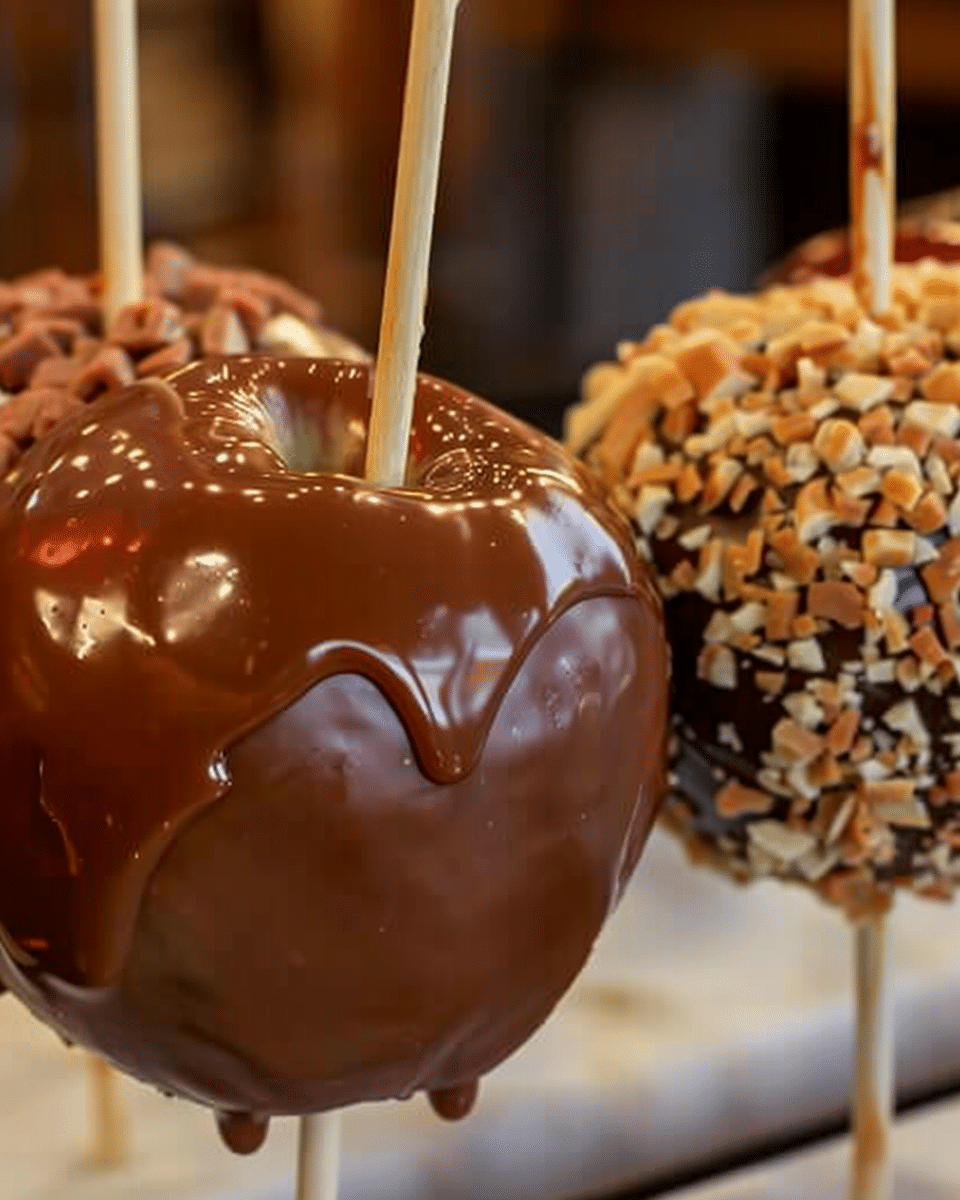
Toppings of choice: chopped nuts, shredded coconut, sprinkles, chocolate chips, cookie crumbles, etc.
Directions
-
Prepare the apples: I wash and dry the apples thoroughly. For store-bought apples, I dip them quickly in boiling water and wipe them with a paper towel to remove the wax coating. I insert sticks into the tops of the apples and refrigerate them to chill. I line a baking sheet with parchment paper.
-
Make the caramel: In a large stainless steel pot, I combine sugar, water, and salt. I whisk over medium heat until boiling. I let the mixture cook without stirring for 8–10 minutes until golden brown. Once it reaches my desired color, I carefully add the cream—it bubbles dramatically—then reduce the heat to medium-low. I stir constantly with a spatula until the caramel reaches 248°F. I transfer the caramel to a heat-proof bowl and let it cool slightly, but not below 215°F.
-
Dip the apples: I take the chilled apples from the fridge and dip them one by one into the warm caramel, coating the tops and sides. The cold apples help the caramel set quickly.
-
Decorate: While the caramel is tacky, I roll or sprinkle on toppings like nuts, sprinkles, or crushed cookies. I place the coated apples onto the parchment-lined baking sheet.
-
Set and serve: I refrigerate the dipped apples for about 30 minutes until fully set.
Servings and Timing
Yield: 12 caramel apples
Prep time: 15 minutes
Cook time: 10 minutes
Total time: 25 minutes
Variations
-
Chocolate drizzle: I melt semi-sweet or white chocolate and drizzle it over the caramel apples.
-
Sea salt caramel apples: A sprinkle of flaky sea salt balances the sweetness beautifully.
-
Cookie crunch: Crushed Oreos or graham crackers make a fun coating.
-
Festive colors: I roll apples in holiday sprinkles for themed treats.
-
Gourmet twist: A layer of melted chocolate before the caramel makes them extra indulgent.
Storage/Reheating
-
Refrigerator: I store caramel apples in the fridge for up to 1 week.
-
Serving: I let them sit out for about 10 minutes before eating so the caramel softens slightly.
-
Wrapping: For gifts, I wrap each apple in cellophane once chilled and set.
FAQs
How do I prevent the caramel from sliding off?
I make sure the apples are wax-free, dry, and well chilled before dipping.
Can I reheat the caramel if it thickens?
Yes, I warm it gently over low heat, stirring until smooth again.
What apples work best?
Tart, crisp varieties like Granny Smith are my favorite, but Honeycrisp and Fuji work well too.
Can I make these ahead of time?
Absolutely—I usually make them the day before serving, and they hold up beautifully.
Do I need a thermometer?
Yes, for best results. The caramel should reach 248°F (firm ball stage) to set properly without being too hard.

Conclusion
Making caramel apples at home is simple, fun, and endlessly customizable. From classic nut coatings to festive candy toppings, each apple becomes its own little masterpiece. This recipe always takes me back to the flavors of fall, and once I tried making them myself, they became a yearly tradition.
How to Make Caramel Apples

5 Stars 4 Stars 3 Stars 2 Stars 1 Star
No reviews
Learn how to make homemade caramel apples from scratch, then dress them up with chocolate, nuts, sprinkles, or cookies for a fun fall treat.
- Author: Sarah
- Prep Time: 15 minutes
- Cook Time: 10 minutes
- Total Time: 25 minutes
- Yield: 12 caramel apples
- Category: Dessert
- Method: Stovetop + Dipping
- Cuisine: American
- Diet: Vegetarian
Ingredients
12 medium apples
¾ cup filtered water
2 cups granulated sugar (or light brown sugar)
1 tsp salt
1⅔ cups heavy cream, chilled
Optional toppings: chocolate chips, chopped nuts, shredded coconut, cookie crumbles, sprinkles, candy bar pieces
Instructions
Prepare the Apples:
Wash and dry apples thoroughly. (Homesteading Hack: dip store-bought apples briefly in boiling water and wipe with a paper towel to remove wax.)
Insert popsicle sticks into the apples. Chill in refrigerator.
Line a baking sheet with parchment paper and set aside.
Make the Caramel:
4. In a stainless steel pot, combine sugar, salt, and water. Bring to a boil over medium heat.
5. Cook without stirring 8–10 minutes, until sugar turns golden brown.
6. Slowly add chilled cream (it will bubble vigorously). Reduce heat to medium-low, stirring constantly until mixture reaches 248°F.
7. Transfer caramel to a heat-proof bowl and let cool slightly (but not below 215°F).
Dip & Decorate:
8. Dip chilled apples into caramel, coating evenly.
9. Roll in toppings or sprinkle toppings over the caramel while warm.
10. Place on prepared baking sheet and refrigerate 30 minutes to set.
Serve & Store:
11. Enjoy immediately or refrigerate for up to 1 week.
Notes
Nutrition values exclude toppings.
For richer caramel, cook sugar slightly darker before adding cream.
Works best with tart, crisp apples like Granny Smith or Honeycrisp.


