
Why You’ll Love This Recipe
I keep making this recipe because it’s incredibly easy and always feels fun. I like that it uses simple ingredients and comes together fast, yet still feels special enough to share. It’s perfect when I want a quick dessert that everyone instantly recognizes and gets excited about.
 Ingredients
(Here’s a tip: Check out the full list of ingredients and measurements in the recipe card below.)
1 pre-made pizza crust
1 cup chocolate chips
1 cup mini marshmallows
1 sleeve graham crackers, crushed
1/4 cup butter, melted
Directions
I start by preheating the oven to 400°F and placing the pizza crust on a baking sheet. I brush the melted butter evenly over the crust, making sure to reach the edges.
Next, I sprinkle the crushed graham crackers evenly over the buttered crust to create that classic s’mores base. I scatter the chocolate chips over the top, followed by the mini marshmallows.
I bake the pizza until the marshmallows are golden brown and gooey. Once it’s out of the oven, I let it cool slightly so the chocolate sets just enough for clean slices before serving.
Servings and Timing
I usually slice this pizza into about 6 servings. Prep time takes around 5 minutes, baking takes about 10–12 minutes, and the total time is roughly 15–20 minutes from start to finish.
Variations
I sometimes add chocolate chunks instead of chips for extra melty pockets. When I want more texture, I sprinkle chopped chocolate bars or drizzle melted chocolate on top after baking. I’ve also tried adding a layer of chocolate spread under the toppings for an extra-rich version.
Storage/Reheating
I store leftovers covered at room temperature for up to 1 day or in the refrigerator for up to 2 days. When reheating, I warm slices briefly in the oven so the crust stays crisp and the marshmallows soften again.
FAQs
Is this meant to be a dessert or a meal?
I serve it as a dessert or sweet snack, but it’s fun enough that it can pass as either.
Can I use homemade pizza dough?
Yes, I’ve used homemade dough successfully, baking it partially first before adding toppings.
How do I keep the marshmallows from burning?
I keep an eye on the oven and pull the pizza as soon as the marshmallows turn golden.
Can I add other toppings?
I like adding peanut butter drizzle or chopped nuts for extra flavor.
Should this be served warm or cooled?
I prefer serving it warm so the marshmallows stay gooey and the chocolate is melty.
 Conclusion
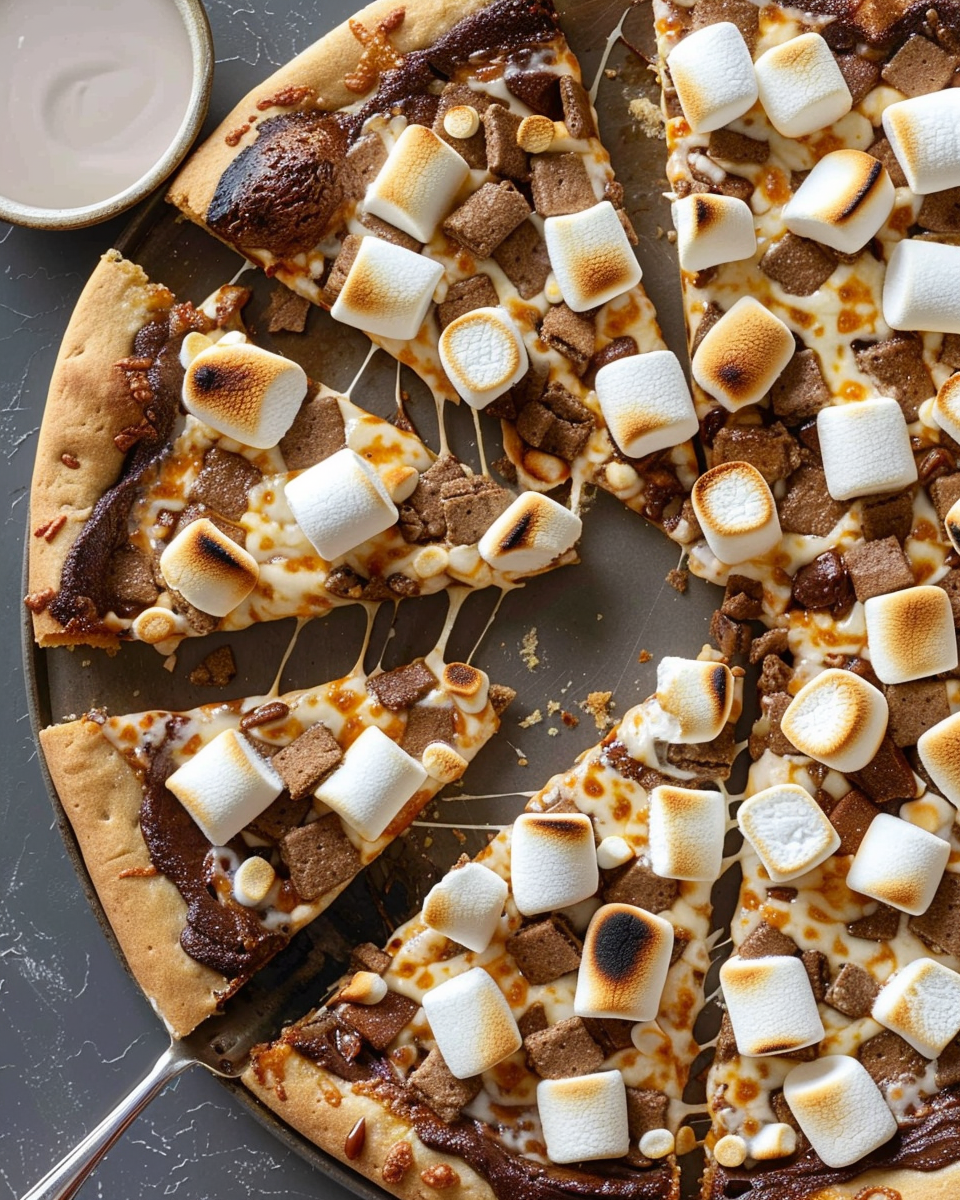
This s’mores pizza with gooey marshmallow is one of my favorite quick desserts when I want something playful and comforting. I love how it captures all the nostalgic s’mores flavors in an easy, shareable format that always disappears fast.
Dinner or Dessert? S’mores Pizza with Gooey Marshmallow
5 Stars 4 Stars 3 Stars 2 Stars 1 Star
No reviews
This s’mores pizza with gooey marshmallow is sweet, melty, and fun, made with chocolate chips, golden marshmallows, and a buttery graham cracker crust.
- Author: Sarah
- Prep Time: 5 minutes
- Cook Time: 10–12 minutes
- Total Time: 15–17 minutes
- Yield: 6–8 slices
- Category: Dessert, Party Treat
- Method: Baking
- Cuisine: American
- Diet: Vegetarian
Ingredients
1 pre-made pizza crust
1 cup chocolate chips
1 cup mini marshmallows
1 sleeve graham crackers, crushed
1/4 cup butter, melted
Instructions
Preheat oven to 400°F (200°C).
Place pre-made pizza crust on a baking sheet or pizza stone.
Brush melted butter evenly over the crust.
Sprinkle crushed graham crackers on top of the buttered crust.
Evenly distribute chocolate chips and mini marshmallows over the graham cracker layer.
Bake for 10–12 minutes, or until marshmallows are golden and gooey.
Remove from oven and let cool slightly before slicing.
Serve warm and enjoy!
Notes
For extra richness, drizzle with melted chocolate or chocolate syrup after baking.
Use a gluten-free crust and gluten-free graham crackers if needed.
Try adding peanut butter chips or caramel drizzle for a fun twist.
Best served warm for maximum gooey goodness!


