I appreciate how easy these mints are to make with just a handful of ingredients. I don’t need to bake anything, and the mixing process is straightforward and satisfying.
I enjoy how customizable they are. I can tint them in different colors, shape them with a fork, or even press them into candy molds for special occasions.
I also like that they can be made ahead of time. Once they set, they’re ready to serve and hold their shape beautifully for parties, weddings, or holidays.
Ingredients
(Here’s a tip: Check out the full list of ingredients and measurements in the recipe card below.)
4 ounces cream cheese (softened to room temperature + 1 tablespoon if needed) 1 tablespoon butter (softened) 4 cups powdered sugar 1/2 teaspoon mint extract neon green, neon pink, and classic blue gel food coloring
Directions
I add the softened cream cheese, butter, mint extract, and powdered sugar to a large mixing bowl.
Using an electric hand mixer or stand mixer, I blend everything for about 3–4 minutes. The mixture looks very crumbly at this stage.
I set the mixer aside and begin kneading the mixture by hand until it comes together into a smooth ball. If it feels too dry, I add up to 1 tablespoon of additional cream cheese.
I use a sharp knife to cut the dough ball into 4 equal portions and place each portion into a small bowl, leaving one portion white.
I add 3–4 dots of gel food coloring to each of the remaining bowls and mix by hand or with a fork until the color is evenly blended.
I line a large baking sheet with parchment paper.
I roll 1 teaspoon-sized balls from each colored portion and place them on the prepared baking sheet.
I dip a fork into powdered sugar and gently press each ball halfway down to create a decorative pattern.
I let the mints rest at room temperature for 4–6 hours to firm up before serving.
I sometimes swap mint extract for almond extract for a different flavor profile.
When I want softer pastel shades, I use fewer drops of food coloring.
I also enjoy pressing the dough into silicone candy molds instead of flattening with a fork for a more decorative look.
For a festive twist, I mix in a tiny pinch of edible glitter for special events.
storage/reheating
I store the finished mints in an airtight container at room temperature for up to 1 week.
If I need to keep them longer, I refrigerate them for up to 2 weeks, separating layers with parchment paper.
I do not recommend freezing them, as condensation can affect their texture when thawed.
FAQs
Why is my mixture too crumbly?
I find that kneading by hand helps bring it together. If it’s still too dry, I add a small amount of extra softened cream cheese until it forms a smooth dough.
Can I use liquid food coloring?
I prefer gel food coloring because it doesn’t thin the mixture. Liquid coloring can make the dough too soft.
How strong is the mint flavor?
The mint flavor is light and refreshing. If I want it stronger, I add a tiny extra drop of mint extract, being careful not to overpower the sweetness.
Do these need to be refrigerated?
They can sit at room temperature for several days, but I refrigerate them if I’m storing them longer than a week.
Can I make these in advance for an event?
Yes, I often make them a few days ahead. Once set, they hold their shape and flavor very well.
Conclusion
I love how these Cream Cheese Mints combine simplicity, sweetness, and a touch of elegance. They’re easy to prepare, fun to customize, and always a hit at gatherings. Whenever I need a colorful, melt-in-your-mouth treat, this is one of my favorite recipes to make.
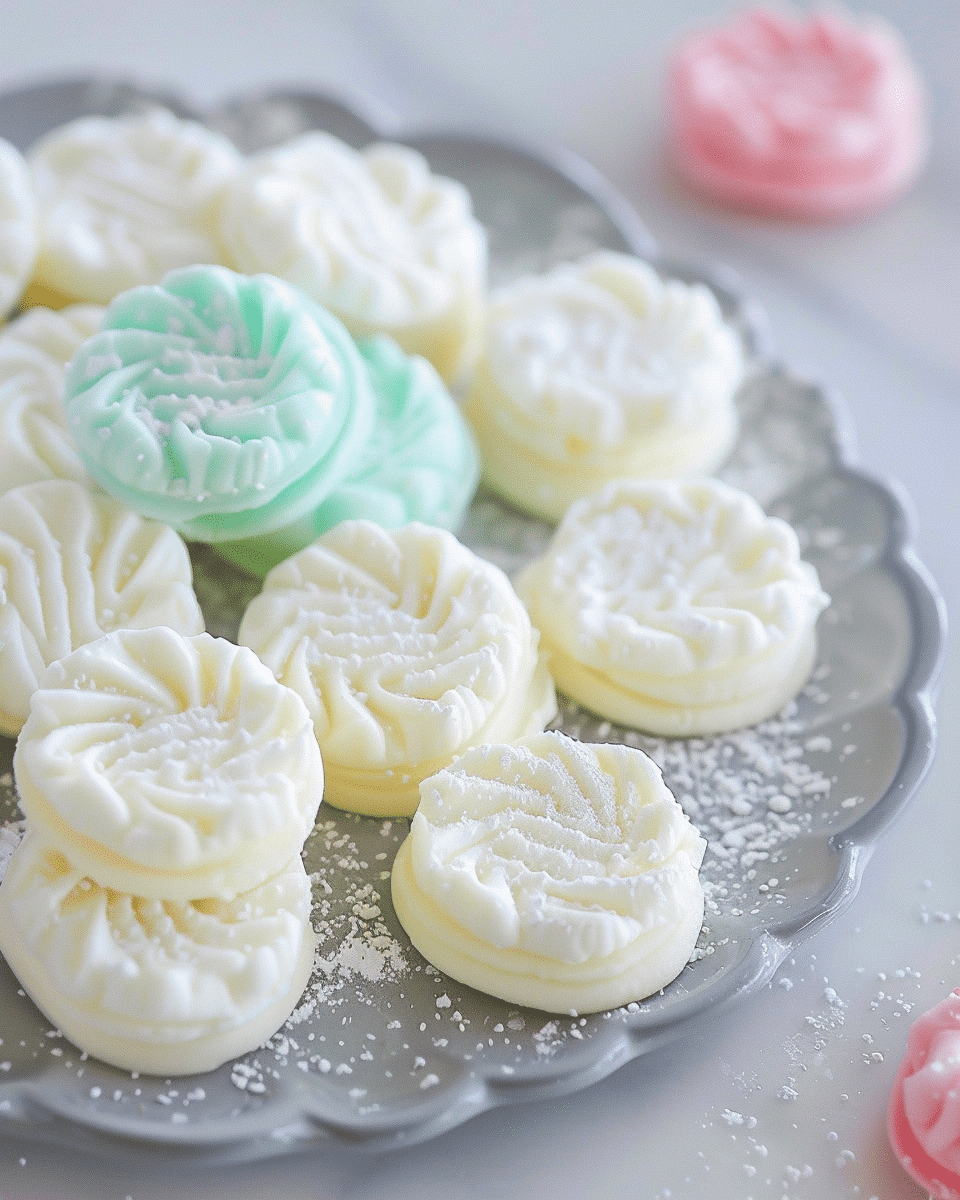
Cream Cheese Mints are soft, buttery and melt in your mouth with a refreshing mint flavor. Made with simple pantry ingredients and tinted in pastel colors, these homemade candies are perfect for weddings, baby showers, holidays and special events.
Author:Sarah
Prep Time:10 minutes
Total Time:6 hours 10 minutes
Yield:40 servings
Category:Dessert, Candy
Method:No-Bake
Cuisine:American
Diet:Vegetarian
Ingredients
4 ounces cream cheese (softened to room temperature, plus 1 tablespoon if needed*)
1 tablespoon butter (softened)
4 cups powdered sugar
½ teaspoon mint extract
Neon green, neon pink, and classic blue gel food coloring
Instructions
Mix Base Ingredients:
In a large mixing bowl, combine cream cheese, butter, mint extract, and powdered sugar.
Blend:
Using an electric hand mixer or stand mixer, beat for 3–4 minutes. The mixture will appear very crumbly at first.
Knead:
Once blended, continue mixing by hand. Knead until the mixture comes together and forms a smooth ball.
Divide Dough:
Using a sharp knife, cut the ball into 4 equal portions. Place each portion into a separate small bowl.
Add Color:
Leave one portion white. Add 3–4 drops of gel food coloring to each of the remaining portions. Mix by hand or with a fork until the color is fully blended and smooth.
Prepare Baking Sheet:
Line a large baking sheet with parchment paper.
Shape Mints:
Roll 1-teaspoon-sized balls from each colored portion and place them on the prepared baking sheet.
Flatten:
Dip a fork into powdered sugar and gently press each ball halfway down to create the classic ridged pattern.
Set:
Let the mints rest at room temperature for 4–6 hours to firm up before serving.
Notes
If the dough is too dry, add up to 1 tablespoon of additional softened cream cheese.
Store in an airtight container at room temperature for up to 1 week, or refrigerate for up to 2 weeks.
For holiday themes, customize the food coloring to match your event.
Avoid using liquid food coloring, as it may alter the texture.


