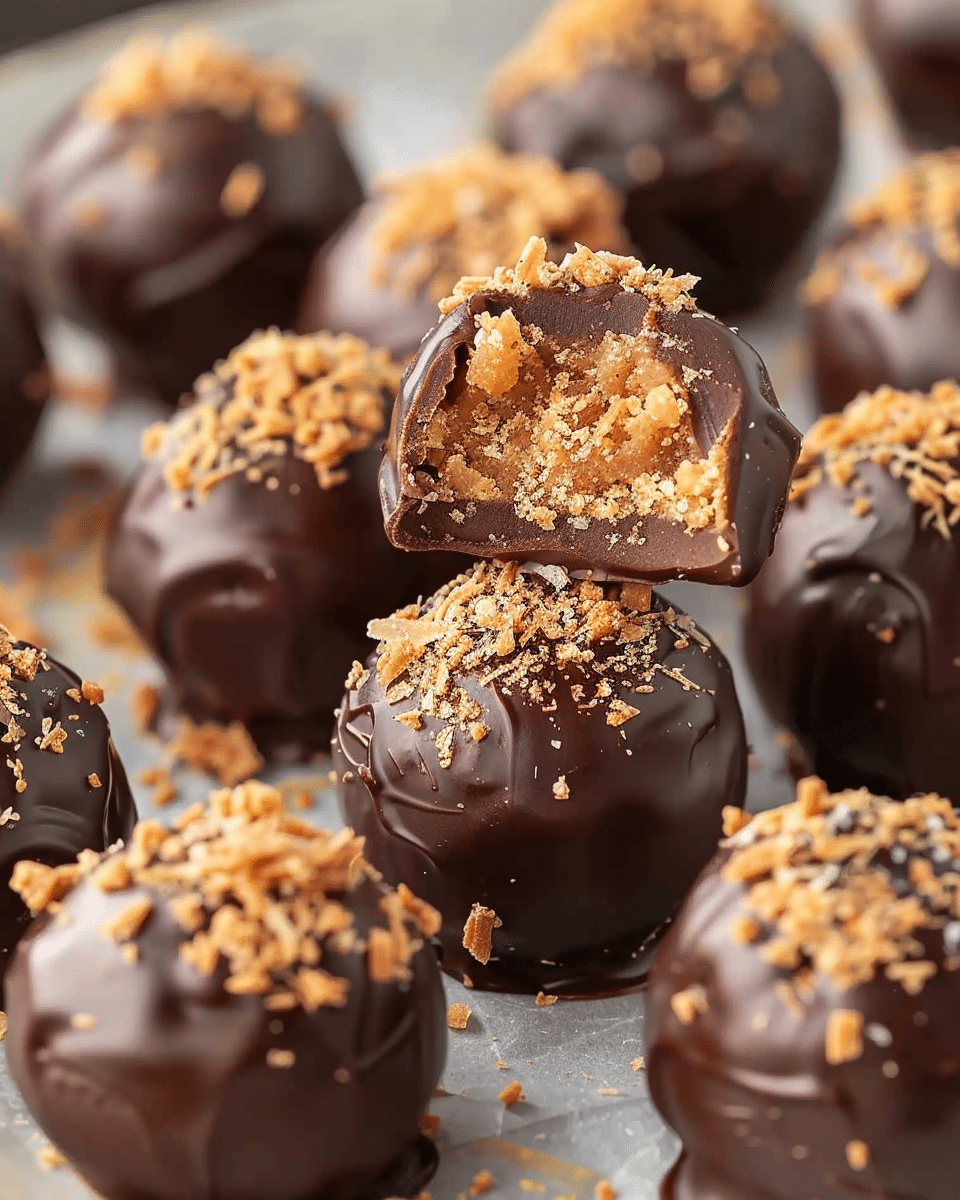
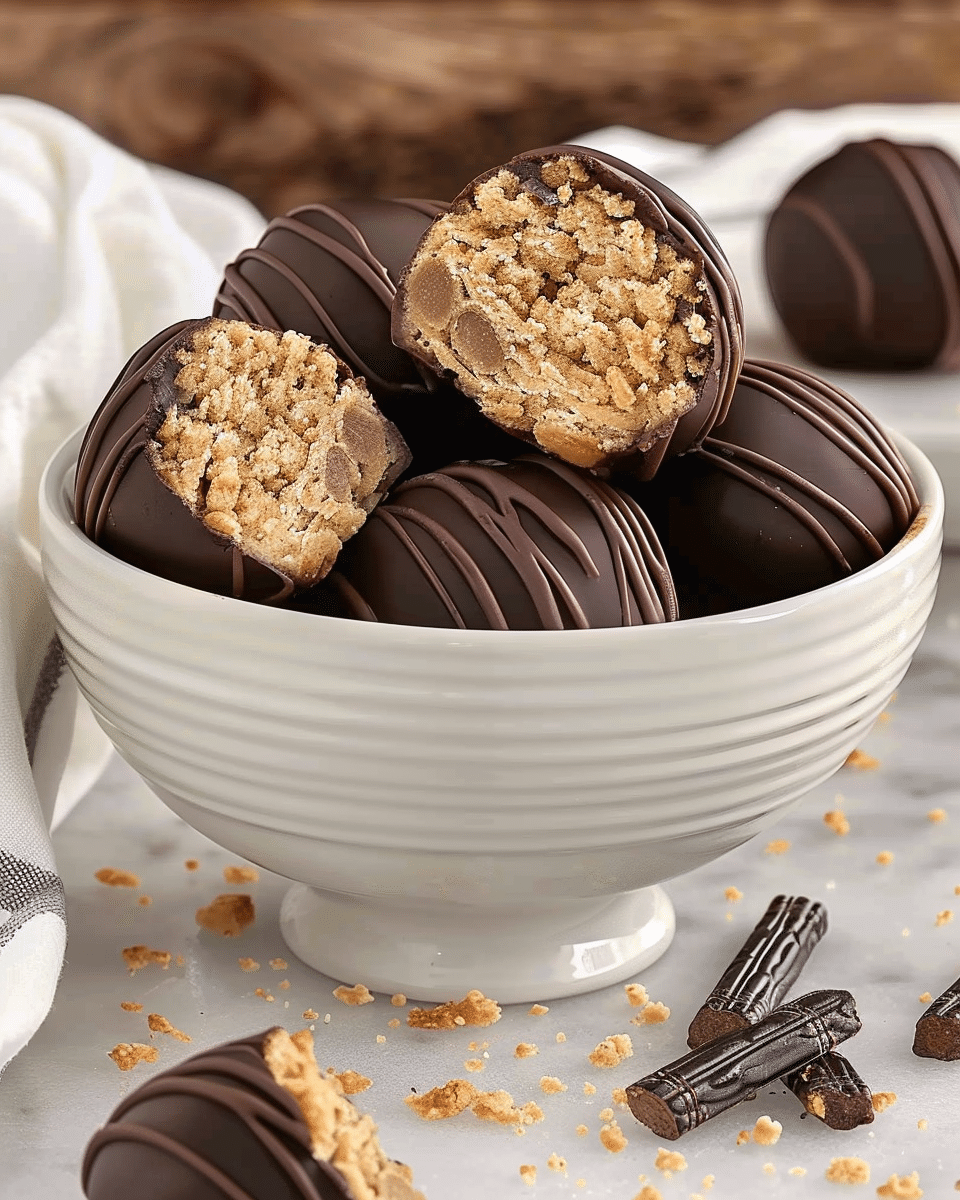
I love this recipe because it’s quick, easy, and doesn’t require any baking. The Butterfinger pieces add just the right amount of crunch and flavor to the peanut butter base, and the chocolate coating makes them feel like a gourmet candy truffle. They’re perfect for gifting, entertaining, or keeping on hand for a sweet treat. Plus, they’re customizable with toppings like sprinkles, sea salt, or extra crushed Butterfingers.
Ingredients
(Here’s a tip: Check out the full list of ingredients and measurements in the recipe card below.)
4 tablespoons butter, softened (½ stick)
1 teaspoon vanilla extract
1 cup peanut butter (avoid all-natural types)
1 cup powdered sugar
¾ cup graham cracker crumbs
½ cup crushed Butterfinger bars
8 ounces chocolate bark or chocolate chips (for coating)
Optional Garnishes
Additional crushed Butterfinger bars
Festive sprinkles
Coarse sea salt
Equipment
Mixing bowl
Baking sheet
Parchment paper
Microwave-safe bowl for melting chocolate
Directions
I start by combining the softened butter, vanilla extract, peanut butter, and powdered sugar in a large mixing bowl. I stir until the mixture is smooth and creamy.
I fold in the crushed Butterfinger bars and graham cracker crumbs until everything is evenly mixed.
Using my hands or a small scoop, I roll the mixture into 1-inch balls and place them on a parchment-lined baking sheet.
I chill the balls in the refrigerator for about 30 minutes so they firm up before dipping.
While they chill, I melt the chocolate bark or chips in the microwave in 30-second intervals, stirring between each, until smooth and fully melted.
I dip each ball into the melted chocolate using a fork or dipping tool, making sure they’re fully coated, then return them to the parchment-lined sheet.
While the chocolate is still wet, I top each ball with crushed Butterfinger pieces, sprinkles, or a light sprinkle of coarse sea salt—whatever I’m in the mood for.
I return the tray to the fridge for about 20 minutes to let the chocolate set.
Servings and timing
This recipe makes about 24 Butterfinger balls. It takes 20 minutes to prep, 10 minutes to coat, and about 20 minutes to chill, for a total of 50 minutes start to finish.
Variations
I’ve swapped the Butterfinger bars for crushed toffee, Reese’s Pieces, or chopped Snickers for different flavor twists.
For a little extra texture, I’ve added crispy rice cereal or crushed pretzels into the base mixture.
To make them more festive, I use colored sprinkles or drizzle white chocolate on top.
Storage/Reheating
I store these in an airtight container in the fridge for up to a week. They also freeze really well—I place them in a single layer until frozen, then transfer to a freezer-safe bag or container. When I want one, I let it thaw in the fridge or at room temperature. No reheating necessary.
FAQs
Can I use natural peanut butter?
I don’t recommend it. Natural peanut butter tends to be too oily or too runny, which can affect the texture of the balls and make them harder to shape.
How do I keep the balls from sticking when dipping?
I chill them well before dipping and use a fork to lift them out of the chocolate, tapping off excess chocolate gently. Parchment paper keeps them from sticking after dipping.
Can I make these ahead of time?
Yes, I often make them a few days ahead of an event. Just store them in the fridge or freezer and they’re ready to serve whenever I need them.
What chocolate works best for coating?
I prefer chocolate bark or melting wafers for a smooth, glossy finish, but chocolate chips with a teaspoon of coconut oil also work well.
Can I make them smaller or larger?
Absolutely. I adjust the size depending on how many I want to make—just remember to chill a little longer if you make them bigger.
Conclusion
These Butterfinger Balls are one of the easiest and most addictive no-bake treats I’ve ever made. With creamy peanut butter, crunchy candy bits, and a rich chocolate shell, they’re a perfect bite-sized dessert for any occasion. I love how versatile and simple they are, and I’m always looking for an excuse to make another batch. Whether I’m gifting, snacking, or sharing, these little treats always bring big smiles.
8 oz chocolate bark or chocolate chips (for coating)
Optional Garnishes
Additional crushed Butterfinger bars
Festive sprinkles
Coarse sea salt
Equipment
Mixing bowl
Microwave-safe bowl
Spoon or cookie scoop
Baking sheet
Parchment paper
Instructions
Make the filling:
In a large bowl, combine softened butter, vanilla, peanut butter, and powdered sugar. Mix until smooth and creamy.
Add dry mix-ins:
Fold in the crushed Butterfinger bars and graham cracker crumbs until evenly mixed.
Shape and chill:
Roll into 1-inch balls and place on a parchment-lined baking sheet. Chill for 30 minutes to firm.
Melt chocolate:
In a microwave-safe bowl, melt the chocolate bark or chips in 30-second intervals, stirring until smooth.
Dip and decorate:
Dip each chilled ball into melted chocolate, let excess drip off, then return to parchment. Garnish immediately with crushed candy, sprinkles, or sea salt if desired.
Set and store:
Refrigerate for 20 minutes until chocolate is set. Store in an airtight container in the fridge.
Notes
Use room-temperature butter and peanut butter for easier mixing.
Do not use all-natural peanut butter—texture will be too oily or gritty.
These are freezer-friendly: freeze in a sealed container for up to 1 month.
Makes a great edible gift or holiday tray addition.


