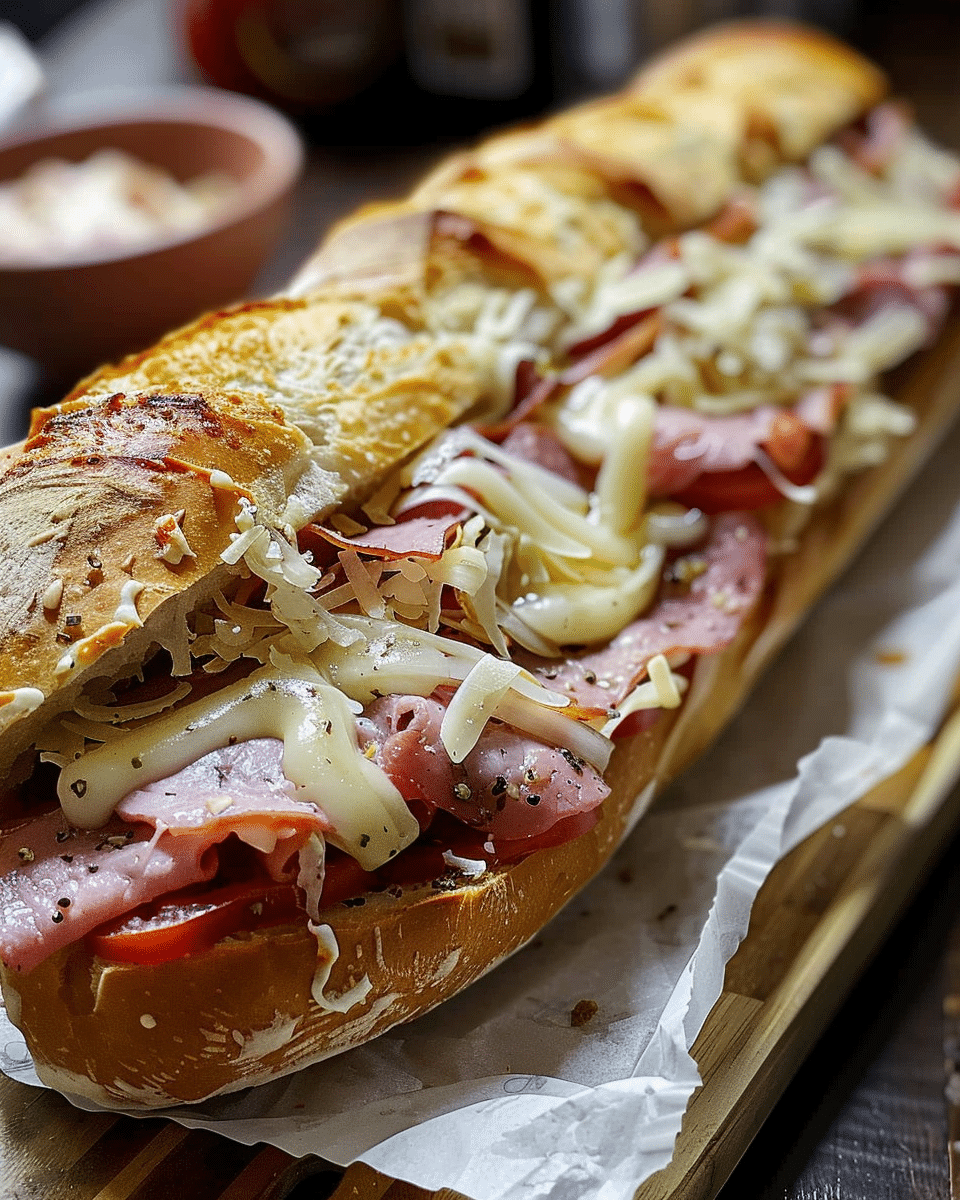
I love how easy and customizable these sandwiches are. I just layer the meats, add cheese, and bake until everything is melty and toasted. The oven brings out the best in the ingredients — crisping the bread and blending the flavors into one epic bite. Whether I’m feeding a crowd or making a quick dinner, these baked subs are always a hit.
Ingredients
(Here’s a tip: Check out the full list of ingredients and measurements in the recipe card below.)
4 sub rolls or Italian hoagie buns
8 slices of salami
8 slices of pepperoni
8 slices of deli ham
8 slices of provolone or mozzarella cheese
1 small red onion, thinly sliced (optional)
1 cup shredded lettuce (optional, for serving)
1 medium tomato, sliced (optional, for serving)
¼ cup sliced banana peppers or pepperoncini (optional)
2 tbsp Italian dressing or oil and vinegar
1 tsp dried oregano
1 tbsp butter, melted (for brushing rolls)
Directions
I preheat the oven to 375°F (190°C).
I slice the sub rolls in half, keeping one side attached, and place them on a baking sheet.
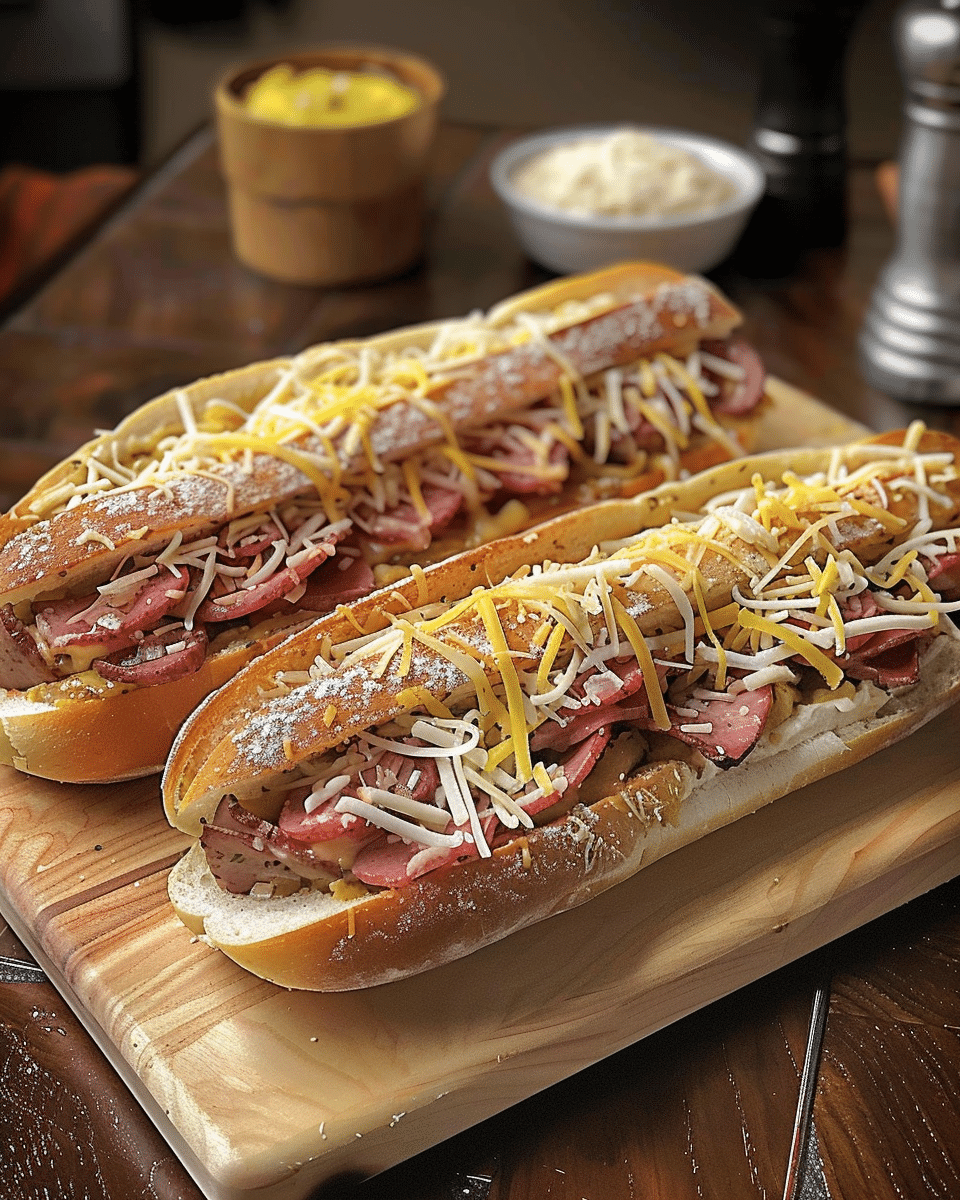
I layer each sandwich with salami, pepperoni, ham, and cheese. If I’m using onions or banana peppers, I add them here.
I drizzle a little Italian dressing or oil and vinegar over the fillings, then sprinkle with oregano for extra flavor.
I close the rolls and brush the tops with melted butter.
I loosely cover the subs with foil and bake for 10–12 minutes until the cheese is melted.
I remove the foil and bake uncovered for another 3–5 minutes to crisp the tops.
I let them cool for a minute, then add lettuce and tomato if I want a fresh crunch before serving.
Servings and timing
This recipe makes 4 sandwiches.
Prep time: 10 minutes
Cook time: 15 minutes
Total time: 25 minutes
Variations
I swap the ham for turkey or roast beef if I want something different.
Sometimes I use spicy capicola or soppressata for more kick.
Adding a slice of pepper jack gives it extra heat.
For garlic lovers, I mix a little garlic powder into the melted butter before brushing the rolls.
I’ve even turned this into a party tray by using slider rolls and baking everything in one pan.
Storage/Reheating
If I have leftovers, I wrap them in foil and refrigerate for up to 2 days. To reheat, I place them (still wrapped in foil) in a 350°F oven for about 10 minutes until warm. I avoid microwaving because it can make the bread soggy.
FAQs
Can I make these sandwiches ahead of time?
Yes, I assemble them up to a few hours in advance and store them in the fridge. I just wait to bake until right before serving for the best texture.
What’s the best bread for this recipe?
I use sturdy sub rolls or hoagie buns that hold up to the heat and fillings. Crusty Italian bread works great too.
Can I add sauce like marinara?
Absolutely. I sometimes spread a little marinara or even pesto on the inside of the roll before layering the meats and cheese.
Do I have to use foil while baking?
I use foil for the first part of baking to keep the bread from getting too crispy too fast. Removing it at the end helps toast the tops perfectly.
Are these freezer-friendly?
They’re best fresh, but I’ve frozen baked sandwiches before. I wrap them tightly and reheat in foil at 350°F until warmed through.
Conclusion
These Baked Italian Sub Sandwiches are the perfect mix of crispy, cheesy, and meaty goodness. I love how quick they come together and how easy they are to customize. Whether I’m making a casual dinner or prepping something special for guests, this recipe always delivers big flavor with very little effort.


